recipe – pink vanilla dream cake
Find a dose of inspiration – and a sugar high, while you’re at it.
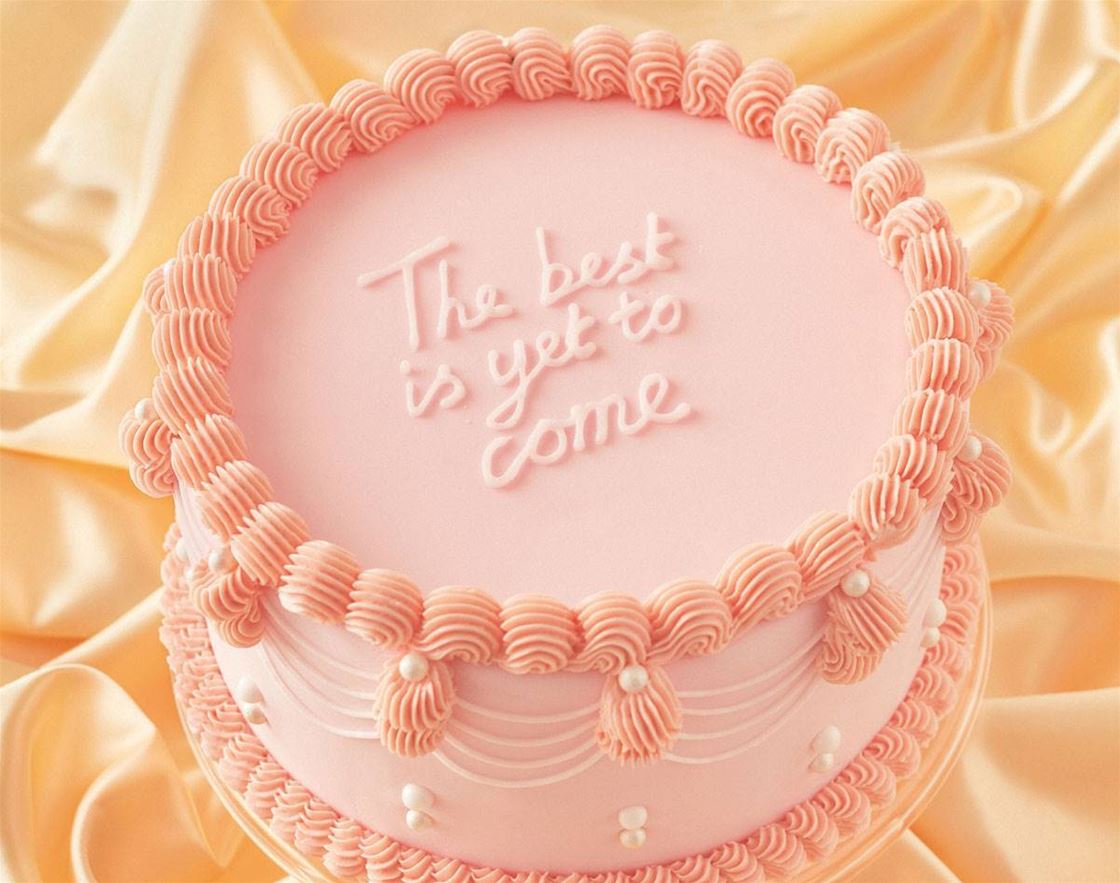
This Pink Vanilla Dream Cake sure lives up to its name. Super-fluffy vanilla sponge is sandwiched together with tart rhubarb compote and silky pink buttercream, then decorated with pink swags and buttercream shells. A (vegan) cake fit for Marie Antoinette herself!
INGREDIENTS
For the cake:
1 1/2 cups caster sugar
2 1/2 cups self-raising flour
1/2 cup cornflour
1/2 tsp fine sea salt
1 tbsp baking powder
200g vegan butter (at room temperature), cubed, plus extra for greasing
190g unsweetened vegan yoghurt
3/4 cup dairy-free milk
1 tbsp vanilla extract
few drops of pink food colouring
For the Italian meringue buttercream:
265ml water
7g potato protein or soy protein
large pinch of xanthan gum
large pinch of bicarbonate of soda
375g caster sugar
500g vegan butter, chilled
2 tsp vanilla extract
1/8 tsp salt
pink food colouring
For the icing:
250g icing sugar
1 tsp cornflour
1/4 tsp xanthan gum
3 tbsp water (you may need more or less)
pink food colouring
To assemble:
250g rhubarb compote
800g–1kg pale pink fondant
dragées (optional)
HOW TO
Preparing the sponges
1. Preheat the oven to 190°C and grease and line the base of three 20cm cake tins with baking paper.
2. Sift all the dry ingredients into the bowl of a stand mixer and mix gently to combine. Add the cubed butter to the bowl, then fit the paddle attachment to the mixer (or use an electric hand-whisk) and beat together on a low speed until the mixture resembles fine breadcrumbs.
3. In a separate bowl, whisk together the yoghurt, milk, vanilla and two drops of pink food colouring. Pour into the bowl of the mixer and beat on low until fully combined. Scrape down the sides of the bowl, then increase the speed to medium-high and beat for about 2 minutes until the mixture is light and fluffy.
4. Pour the batter evenly into the three cake tins, then smooth out the tops using an offset spatula. Bake in the oven for 20 to 25 minutes; when baked, the sponges will spring back when lightly pressed. Leave in the tins for about 10 minutes, before turning out onto a wire rack to fully cool. Once cooled, use a large serrated knife to slice off the rounded dome tops so you have a level surface for stacking.
Making the Italian meringue buttercream
1. Put 140ml of the water, potato or soy protein and xanthan gum into a small bowl and whisk together. Then, put the bowl in the fridge for 30 minutes for the protein to rehydrate.
2. Add this liquid to the bowl of your stand mixer fitted with the whisk attachment (or use an electric hand-whisk), followed by the bicarbonate of soda. Whisk the mixture for about 5 minutes.
3. Put the sugar and remaining water into a pan and place over a medium heat. Bring the mixture up to 110°C, then reduce the speed on the mixer to medium-high. Continue cooking the sugar syrup until it reaches 118°C, then remove from the heat and slowly pour into the mixing bowl with the machine still running. Increase the speed to high and continue beating until the bowl is cool to the touch.
4. Chop the butter into small cubes, then begin adding it in small quantities, beating after each addition, until it’s been fully incorporated. Don’t worry if the mixture looks as though it’s curdling – it should come together at the end.
5. Add the vanilla and salt and mix until evenly combined. Then, add a few drops of food colouring until you have your desired shade of pink. Transfer about two-thirds of the buttercream to a piping bag and cut a 1cm hole in the end.
Assembling the cake
1. Place one of the sponges on a cake board using a blob of buttercream to secure it. Then, pipe a layer of buttercream onto the sponge and smooth with an offset spatula. Pipe a buttercream ‘dam’ or line around the edge, then fill with half the rhubarb compote, before topping with the next layer of sponge. Repeat to make the second layer, then place the third layer of cake on top, cut side down. ‘Crumb coat’ the whole cake – spreading a thin, even layer of buttercream on every surface – and refrigerate for at least 3 hours.
2. When the cake is chilled, knead and roll out your fondant, then cover your cake, following the instructions on the packet. Next, make the icing. Sift the dry ingredients into a bowl and mix until evenly combined, then gradually add the water a tablespoon at a time, mixing with each addition. (To test the icing is at the right consistency, pull up a spoonful and let a thin trail drop back into the bowl. It should be able to hold its folds without disappearing into the mixture.) Add in the food colouring till you get your desired shade.
3. Transfer the icing to a small piping bag. Write a message on your cake, if you like, then pipe ‘swags’ (the swooping lines) around the sides of the cake. You may need to practise this a bit to get it right – just make sure you’re holding the piping bag on a 45-degree angle!
4. Put the remaining buttercream into a piping bag fitted with a small/medium French star nozzle. Pipe one large shell between each swag by, again, holding the piping bag at a 45-degree angle from the side of the cake, hovering the tip where you want the shell to start, squeezing the bag while pulling up, and releasing the pressure so the shell tapers at the top. Use the same technique to pipe a border around the top and bottom of the cake.
5. For an extra bit of fanciness, you can finish the cake by gently pressing dragées into the fondant at the tops of the shells and between the swags.
This is an edited extract from Vegan Cakes by Sarah Hardy, available for around $24 through Quadrille. See more lovely recipes at hebekonditori.com

.jpg&q=80&h=682&w=863&c=1&s=1)


.jpg&q=80&w=316&c=1&s=1)










.jpg&q=80&w=316&c=1&s=1)


